 There are things that are worth repairing..and there are things that perhaps are not worth repairing(cheap knit tops from big box stores come to mind).
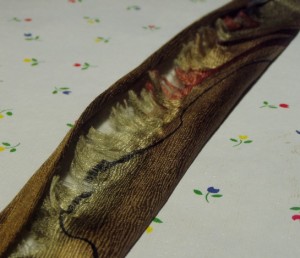
On the other hand, your Aunt Toby is not asked to do repairs very often, and even less often by the DH, so when he handed over what looked like a dearly departed silk tie with a sniffle, I couldn’t deny the request. After all, it was a gift from ME, for heaven’s sake. One hundred percent silk, famous name on the label. Hubba Hubba. But, a wreck, nonetheless. A testament to how often the DH wears it, this tie had a lower half that frankly looked as if someone had taken a piece of sand paper to it (see photo above). The hand stitching which held the edges together had loosened and come apart and the bottom half (which as anyone who wears a tie knows, is the part that goes to the inside, against the wearer’s shirt and goes unseen) had, in being worn, rubbed against the DH’s shirt (who knew the fabric from men’s cotton dress shirts could eviscerate silk?) and had literally shredded and worn away.
“Is this worth trying to fix,” the DH asked plaintively. All that was missing was a small twinkly trickle of tear moving down his weathered cheek. So, out came the pincushion, thread, pins and needle. But first, I needed to examine the wreckage in detail and to do that, I needed to smooth the whole thing out, so I lightly pressed it, pulling the edges this way and that to see if there was enough fabric at the back still left to do a hand seam.
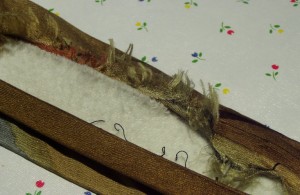 Mmmm. No. As you can see from the giant gulf there in the photo, too much of one side had shredded away. What to do? What to do?
Well, I had a couple of things in my favor here. First, it was the back of the bottom of the tie, the part that no one actually sees. As a matter of fact, there are men who tuck this bit inside their shirts. Second, only one side was ruined, so all I needed to do was figure out a way to make the tie itself a little bit more narrow so that I could harvest the space, pull the wreckage tighter to the middle and fold over the other side and sew it that way.
But, how to make the tie more narrow? A man’s tie structure is basically determined by the tie interfacing that inside the tie (tie interfacing is very special stuff – it basically feels like slightly thick flannel). So, in order for me to make the tie more narrow, I needed to get to the ‘guts of the tie’ (so to speak) and make that part more narrow first.
Now, something lucky here is that the interfacing on this tie was not secured in any way at this end of the tie. I don’t have any other experience with men’s ties, so I don’t know if this is an industry standard.
I opened the seam all the way to the bottom and found this. 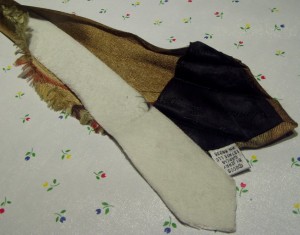 I could literally poke my finger into the point at the bottom of the tie and pull out the piece of interfacing. I was very careful just to do this and not pull it in any way because I didn’t want to disturb the rest of the tie since I figured if the interfacing was not secured at the bottom, it was probably not secured at the top either.
Now the problem of the tie was really at one side, but I was concerned about the balance of the bottom of the sides of the tie so I took out my shears and very…slowly…and carefully too very narrow shavings off the sides of the tie interfacing. I removed about 1/16″ off each side of the tie from the bottom of the interfacing to slightly above the part on the silk where the wreckage started, grading it in.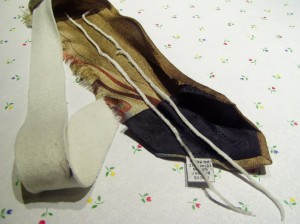 Then, I put the interfacing back inside, pinned the sides back up and tested to see if I’d shaved off enough. It was, but if I had needed to take off a little more, I’d have been able to do that too.
Once I got it settled, then I repinned the sides together, with the wrecked side covered by a folded edge of the good side and pinned that down all the way.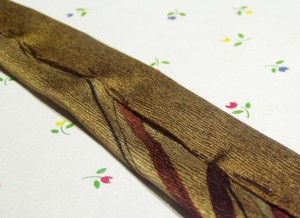 And here is where the title comes in. I know there are folks who sew everything under the sun out there — clothing, backpacks, you name it, who absolutely hate hand sewing. With a passion. Avoid it like the proverbial plague. Well, there are certain items which cannot be sewn on a machine because of the fact that the stitches will show on the right side and a tie is one of them, so having a lot of practice sewing by hand and having the feel of how deep to put in the needle into the piece of fabric so that it does not show on the other side is a skill worth practicing for sure. I used a slip stitch, which you might not be familiar with. For more information on hand stitches and pictures showing what’s going on when you do them, go here: Hand Stitches
In the end, I was able to give the DH back his lovely silk tie, in condition where he’ll be able to wear it for another several years until he has to bury it in a cotton-lined box in the back yard or something. it’s nice to be able to put something worth the work back ‘on-line’.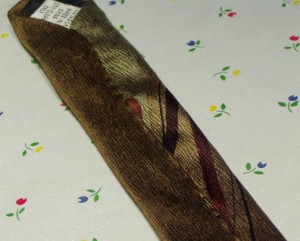

GREAT JOB! This from someone who actually PREFERS to sew by hand! How many times have I had to ‘rip out” because the machine’s sewing action pushed everything askew! I have leared my lesson about basting! Plus, being able to sew by hand improves hand-eye coordination and fine motor control; what’s not to like?
And I have seen, time and again, people who absolutely REFUSE to baste anything due to their hatred of ‘hand sewing”-and who then have to rip out crooked machine stitching-and rip again until the material is DESTROYED. Just BASTE the damn thing already! The energy they spend trying to dodge having to put in a little basting (which takes hardly any time at all) is spent ripping and ripping and RIPPING! How dumb is that?
Thank you so much for the kind words!!
@ Sufiya: Right on!